
New design of a lush private retreat.
BLOG
Here is what we have been up to!

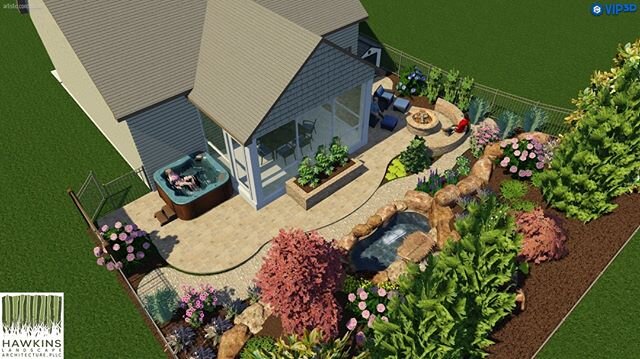
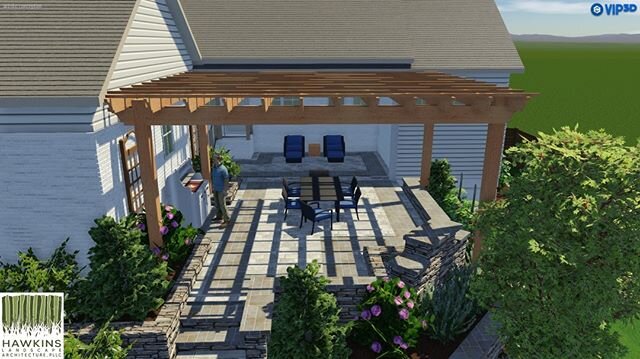
Porches! This year has been the year of home renovations, many including screened or grilling porches. This porch is off of a stately home on High Rock Lake. The porch serves as a covered area for outdoor dining and entertaining off of the new pool! The design not only included the porch with grilling/dining area and custom fireplace, but also a new shotcrete pool with infinity edge and spa. Other porches I have designed this year have many other types of amenities:
*Fireplaces and other Fire Features
*Built In Kitchens- these kitchens can include more than just a grill, how about a pizza oven, Green Egg, kegorator, or a built in bar?
*’EZ Screen folding doors, that can allow the porch to either be open air, or open entirely to allow the fresh air and dining alfresco:)
*Built in Hot Tubs
*Built in Showers
The sky is the limit when designing these wonderful home renovations. Most homeowners can expect a return of 84% on their investment when they add a porch to their home- so a great value for the money! Using my 3D imaging technology, customers are able to see the finished porch before construction:) See more projects such as this on my Instagram- https://www.instagram.com/3dlandscapearchitect/


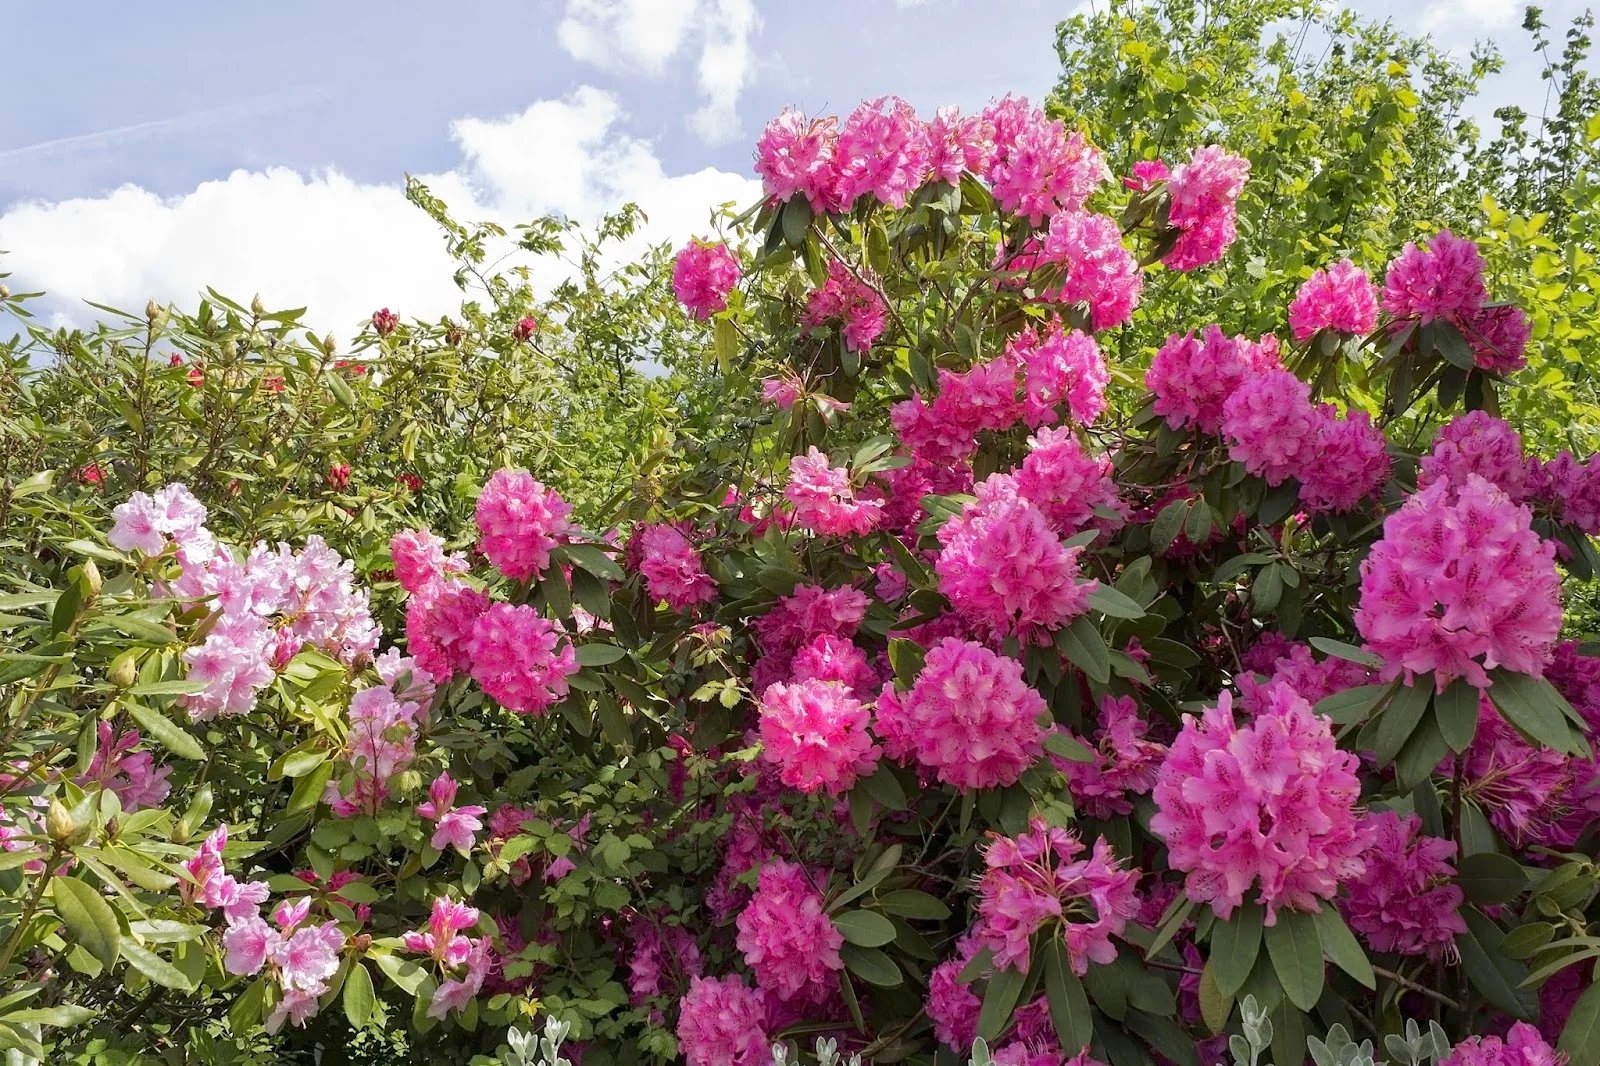
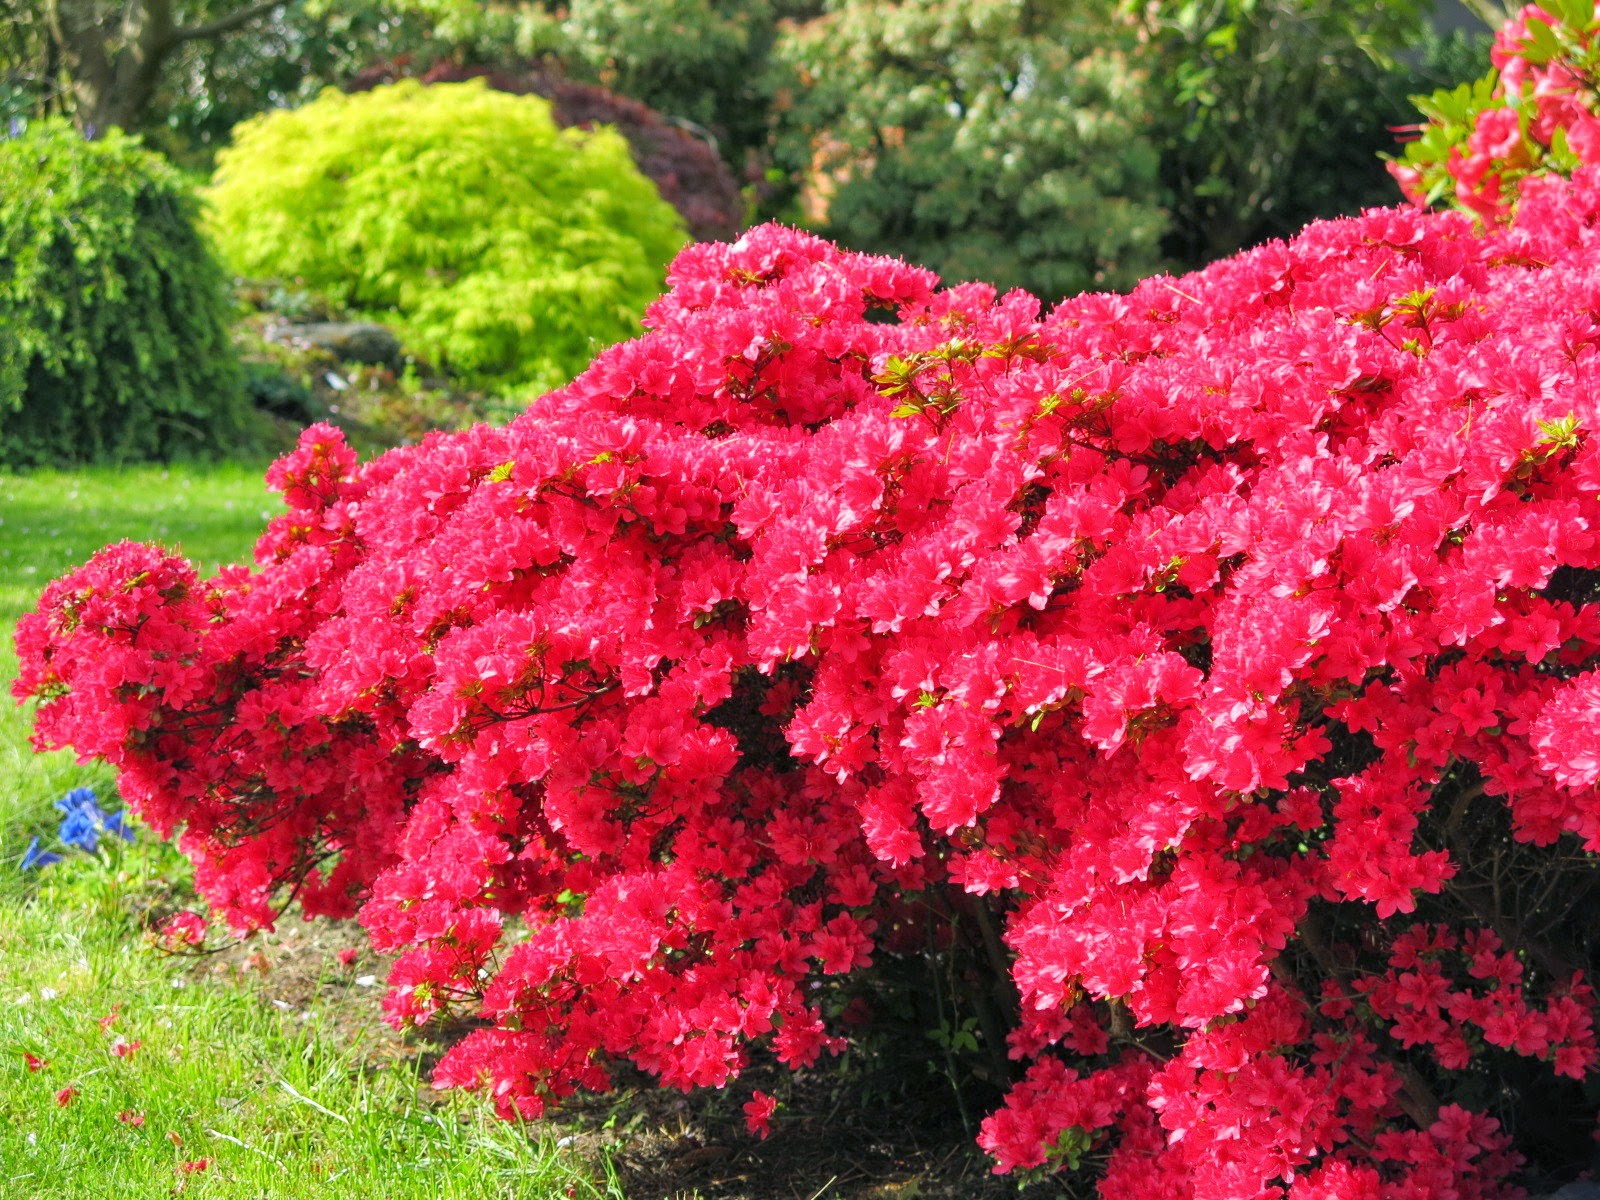
Are you tired of paying for the upkeep and maintenance of your landscape? Do you wish you could get out in your lawn and do some of the work, but don’t know where to start? It can be overwhelming when you look at all of the tasks that are required by both large and small landscapes. Let’s take one task off of that list - pruning hedges. The good news is that the main principles of pruning are fairly simple and easy to follow. Here are the basics for pruning hedges in your landscape:
PRUNING HEDGES
Benefits of pruning hedges
Encourages development
Better looking, healthier plant
Not as susceptible to disease
If you don’t prune hedges...
Plants can be weak
Branching will only occur at tips of stems
Hedge won’t be dense enough to support weight
Can cause ‘dead space’ in the interior of plant where leaves don’t grow due from being shaded out by external growth
When do you prune shrubs? *these are general rules and may vary from shrub to shrub
Prune off one-third or one-half of your young shrub within the first month of planting to ensure proper health and development
non-flowering: prune in early spring before new growth
summer flowering: prune in late winter or early spring before bud set to encourage heavy flowering
spring flowering (flower before June 15): prune soon after flowering so as to not remove buds for the next year
Formal hedges *pay attention to flowering for timing & use lateral cuts
Sheared/shaped to geometrical shape
Before new growth in spring-during/after 1st growth spurt
New leaves cover up pruning cuts
Don’t prune late summer (Aug-Sep)
Level top & sides
Should be in 2nd or 3rd yr of establishment
Long formal hedge- use powered hedge trimmers
Broad leaf or short formal hedge- use hand pruners
Won’t cut wide leaves in half
Bottom of plant wider than top
light reaches plant
Start at bottom, work up & taper sides
Use guide for accuracy
1x1s slightly taller than hedge with joint wing nuts to adjust angle
Informal hedges
Most can be thinned any time of year (see flowering time if it flowers)
Let grow through 2nd season
Only rejuvenate
Hand pruners/ loppers
Thin branches
Lateral cuts
Allows sunlight to reach plant
Rejuvenating shrubs
When a shrub is overgrown
Some can be cut 2-3” from ground
Holly, spirea, privet, etc.
NOT for needled evergreens- will not regrow on bare branches
Can do over several years
One-third of stems to ground each year
Doesn’t look good at the time, but will be best in the long run - plant will look better with time

Water Is an important natural resource
"With water becoming a scarce natural resource across our country, water conservation has become a driving design force in the landscape industry. There are many benefits, both for us and our society, that can be seen by adopting water-wise practices in residential and commercial landscapes. Water conservation not only preserves this precious resource but also helps prevent water pollution to our local water supplies. As a landscape architect, these principles are used in my designs to be mindful of our common goal: responsible stewardship of the land." . . . . . To read more, see my article in 'Lawn and Landscape' magazine, see the link below:
http://www.lawnandlandscape.com/article/10-design-tips-for-water-conservation/

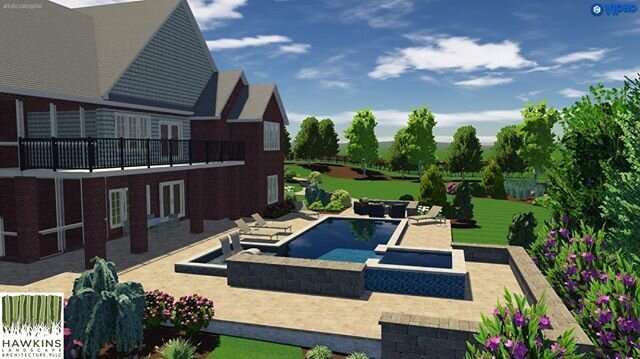
3D landscape design, pool with pool deck, pergola
Thinking about trying 3D landscape design for your landscape business? Take a look at my latest article here for tips and discussion of the technology.
http://www.lawnandlandscape.com/article/try-3-dimension-landscape-design/
See more and follow me on INSTAGRAM!
Creating your own organic compost soil can be a very fun and satisfying project for everyone, including the whole family! It’s a great way to get some Vitamin D and spend quality time outside. Your garden will THRIVE from composting. It's a healthier, less expensive, and sustainable alternative over many garden and potting soil products. Composting is such a simple process that utilizes your table & kitchen scraps to make an incredible, organic SUPER soil for your garden and plants. There are several different techniques to use, so finding out which one suits you shouldn’t be all that difficult. By creating your own organic compost soil for vegetables and flowers, our greatest friend Mother Nature, will reap many benefits from your contributions. The biggest benefit of all is eliminating the need of harvesting peat moss bogs, which are very important for filtering through co2 emissions, and they're being destroyed at alarming rates. You’ll also eliminate the need for other resources used in garden soils- such as; composted pine bark, perlite and vermiculite.

The first step is to determine which method you’ll want to use for your organic compost and where you want to place the composting and garden areas. The size of the operation is all up to you, but you want to make sure the area is; easy to access, has proper runoff, and a good amount of sunlight. The two most popular methods for the actual composting process are simple.
1) One way is to simply go from table scraps to soil, bypassing any containers. This is usually used for smaller scale composters. Take all your kitchen scraps; such as fish bones, chicken bones, egg shells, coffee grounds, banana peels, etc. Place them in a plastic bag or designated container inside the house and every few days take the scraps to the compost pile, dig a couple feet down and dump the matter inside. After dumping everything into the soil, stir the compost soil up to spread all the nutrients around (this helps aid the decomposition of the organic materials). You’ll want to stir and mix the soil at least once a week to spread the nutrients around!
2) The 2nd method is using a composting container outside that holds all the organic matter! You can have one that is on the ground surface or one that is up on a stand (to prevent critters and pest from scavenging). You can purchase containers made specifically for composting or create your own. Creating your own is a cheaper alternative and you’ll have many more size options. To make your own, you can purchase a trash can, and simply poke a few holes in the lid and on the sides. This will allow the materials to breathe and breakdown properly.
You can’t go wrong with either of these options and they’re so simple you don’t need a professional landscaper to assist you. If you decide to use a container, make sure to fill the container close to the top and stir once a week to keep the process moving efficiently. Depending on how much you want the organic matter to breakdown, you’ll let the material sit there for 3-6 months. This is enough time to start the decomposition process before you dump everything in the ground and start the next step of organic composting. This is a good process for larger scale operations and allows for a really thorough system to be put in place. No matter which method you use, the entire process takes about a year for everything to chemically breakdown and be ready for use.
Now that we’ve established what type of set up we’ll use AND the location of our compost piles, we can talk about what type of leftovers we can use. The basics are any scraps you might have from cooking such as egg shells, coffee grounds, the leftovers from any fruits and veggies, and more. Then there are the not so basic leftovers like; grass clippings, leaves, spent vegetable crops, fish and chicken carcasses. What a lot of people don’t know, is that you can ALSO use recycled newspaper that’s been shredded, as a sustainable substitute for peat moss. To create a solid base, you can use starters such as leaves from the lawn or coffee grounds. The cool thing about using coffee grounds is many places like Starbucks and Dunkin Donuts, bag up their used coffee grounds for people to come grab for FREE!
When you're officially ready to start your composting pile, you should allow 8-12 months for everything to break down and decompose before using anything in the gardens. Since it takes so long, you may want to consider two separate piles! This way you’ll always have soil ready to use for crops and gardens. The first year’s crops will be bountiful and very rewarding. Although, for crops to be at peak performance, it may take several generations of crops to cycle through. BUT once that happens, your gardens yield and health will increase tremendously. The best part of it all, IT’S 100%FREE!! You’ll save so much money each year by eliminating the purchase of bagged soil and at the same time you’ll save many of earth’s natural resources from destruction.
By choosing to start an organic compost you’ll save money, upgrade the health and quality of your gardens, get involved in a self-efficient lifestyle, and the most important of all, make a positive environmental impact. Most landscape materials use peat moss, which is being harvested at an alarming rate. Peat moss cycles through 30-33% all known carbon emissions. That’s the number one contributor on this planet, including our forest. We all need to do our part in trying to protect them, one bag at a time. There are other peat moss alternatives to use if you still choose to purchase bagged and loose products. Get out there and start your organic compost garden today!! For more helpful tips for DIY projects or to seek our professional services, please visit our website and give us a call today.

FROM THE GROUND UP is a full service sod and landscaping company serving all of Central Florida including: Tampa, Lakeland, Orlando, Kissimmee, DeLand, Ormond Beach. New Symra and more. They are experts at creating the outdoor experiences their customers have always dreamed of! In Central Florida? Give them a call.
FROM THE GROUND UP (407) 501-2107 http://www.sodandlandscaping.services/
See more and follow me on INSTAGRAM!
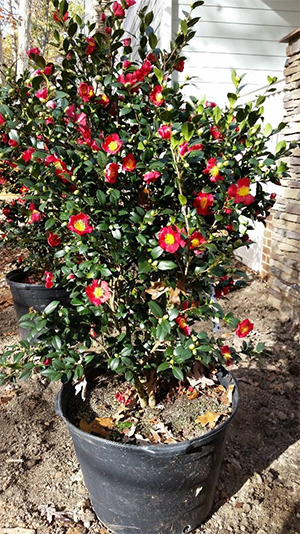
Habit/Description: Originally from China and Japan, this lovely evergreen shrub/small tree, is now a staple in American gardens. The unusual bloom time, beautiful flowers, tighter habit and lustrous dark leaves make this a favorite of gardeners. Pair the Camellia sasanqua with the large foliage of Hydrangea, Holly, Hostaand Heucherafor a beautiful shade display.
Size At Maturity: Moderate growing rate. Will reach a height of 8-10’ and 8-10’ wide. Can withstand pruning to shape.
Flower: Blooms in winter, when nothing else has interest-November-January. Flowers are red, with yellow center. No fragrance.
Special Interest: Unusual bloom time, along with the smaller stature and evergreen habit make this a favorite.
Care Information: Provide well-drained soil, rich in organic matter. Prefers filtered light. Provide regular water during the first growing season. Will require less water once established.Water3” when the top part of the soil is dry. Prune only in winter after flowering. Fertillizewith an acid fertilizer after flowering.
See more and follow me on INSTAGRAM!
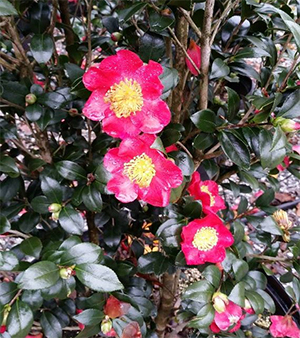
While most southern gardens sport at least one ‘Old-Timey’ Camellia, i.e. Camellia japonica, I tend to prefer her more versatile and beautiful sister, Camellia sasanqua. Many gardeners are not as familiar with the use of this gorgeous shrub/small tree. It has many applications for small and large gardens here in zone 7-8- let’s take a look at a few reasons why you may want to try it in your garden:
Smaller, More Manageable Size: A typical Camellia japonica can grow into a very large shrub, limiting its use in some applications. Camellia japonica can grow upward of 15’ tall in some areas with a 10’ spread. The sasanqua, on the other hand, keeps a more manageable size of 10-12’ x 4-5’ wide. Dwarf varieties have also developed, in the 3-4’ range. One such variety is ‘Chansonette.’
Flowers and Foliage: Sasanquas also have a finer texture to their leaves than Camellia japonica. At about half the size of japonicas, the leaves are a glossy green, finely toothed and emerge with a bronze color. Sasanqua blooms are typically in the fall and winter when there are limited floral displays among other plant materials. The blooms have quite a variety of hues, with single, double and semi-double blooms in shades of pink, red, white and other varieties. Almost all have yellow centers. In the picture below, a group of 3- Camellia sasanqua ‘Cleopatra’ grace a corner of one of my planting designs.
Color and Fragrance: Camellia sasanqua is most closely related to the Tea Camellia, Camellia Sinensis, whose blooms exude a tea-like fragrance. Many of the sasanquas also have fragrant blooms, such as‘Pink Yuletide’, ‘Fairy Blush’ or Marge Miller.’
Interesting uses: There are many unconventional uses of the Fall blooming camellias in the landscape, here are just a few:
• Tree-form: This practice is commercially used on other evergreens such as hollies. The natural habit of the Camellia is to grow to the ground, in a shrub form. To ‘tree-form’ a plant is to remove the lower branches, allowing a full crown of evergreen leaves to remain at the top. The effect becomes that of a small tree, which can have many applications in the landscape.
• Espalier: Growing a tree or shrub flat against a wall or another structure is an ancient practice that ‘trains’ the Camellia by pruning. Spring and fall pruning by removing the outward growing branches, and tying or tacking the remaining branches to the structure allows the camellia to grow ‘flat.’ The outcome is truly breathtaking when the Camellia is in bloom.
• Sheared Hedge: Although I don’t normally suggest this practice, I have seen Cam. Sasanqua maintained successfully as a large sheared hedge. The flowers are still spectacular. You will need to maintain it, however, with consistent shearing or your hedge will get away from you!
New Varieties: New varieties are always being developed. Here are a few:
• ‘Stephanie Golden’ – sports a light rosy fragrance.
• ‘Kumarsaka’- Bright pink flowers with a yellow center.
• ‘White Doves’- White semi-double flowers, only growing 4-5’ high.
Colder climates also can enjoy Camellias with the ‘Ice Angel’ varieties. These new cold hardy camellias will bring a touch of color to zone 6 winter gardens.

See more and follow me on INSTAGRAM!
Preparing your yard for the cooler months can be overwhelming. There are so many suggestions, it can be hard to know where to begin. From gutters to mulch, there are so many tasks to winterize your landscape that you could be busy all winter. However, some are more vital than others. It’s a great idea to take advantage of the cooler weather to tackle some yard tasks that require a bit of time. You can improve your landscape during the fall months while maintaining the necessary winterizing to keep your home healthy.
Hawkins Landscape Architecture
Aerate and Fertilize
Fall is the best time to aerate and fertilize your lawn. An aerator pokes small holes in your lawn so that air, water, and fertilizer reach the grass’s roots. This will get rid of any lawn compaction and debris lodged under the surface. If you have a new home, it is especially important to aerate. Once you have aerated your lawn, it’s a great idea to fertilize to keep your grass growing over the fall months. Do some research to find what fertilizer is best for your type of grass and climate.
Fill Low Spots
Fill any low spots that have formed near your home’s foundation. To repair a low spot, remove the grass with a shovel and fill the spot with soil mix. Be sure to water and fertilize directly after. You always want to slope your lawn away from the home so that you can avoid any water leaking into your basement. A flat lawn will avoid pooling water that kills your lawn and attracts insects. You will find tons of lawn improvement ideas at Modernize.com.
Prune Your Plants
Prune your plants once they become dormant or no longer produce fruits or flowers. Pruning encourages new growth, so wait until your plants stop producing naturally before your final pruning. Clip off all of the lower growth near the stem. Remove any unruly sprouts so your plant will grow in a nice shape next season. Be sure you cut less than ¼ inch from the main branch so that disease cannot enter the raw opening.Give large bushes and trees special attention. These larger plants tend to overwhelm the landscape in the winter months, quickly making the yard look disheveled.
Add in Fall Accent Plants
There are many beautiful colors associated with fall. Burnt oranges, yellows, reds, and deep greens are favorites. Find a few plants to accent your yard with the vibrant colors of fall. Pansies grow for up to six months a year and can be found in fabulous deep reds and oranges. They are low to the ground and make a great fall accent. English primrose makes an excellent hanging plant for porches, adding deep yellow to your landscape.
Get Rid of Weeds
You can’t see it, but the fall months are the time when your lawn’s root system is expanding the most. It’s important to clear out space underground so that the systems can grow and blossom in the spring. There may not be much happening above ground, but everything underneath is developing. Weeding is tedious work, but it is much better to get it done during the cool season, clearing out room for growth in your yard, than to allow weed roots to grow all winter alongside your grass. By the time the grass sprouts in spring, the weeds will have a strong foothold and will be much tougher to remove.
ABOUT THE AUTHOR:
Modernize.com is where you come to get inspired, see what's possible, and connect with a professional who will make your dream home a reality.
See more and follow me on INSTAGRAM!
We would love to hear from you and discuss your project. Please enter your details in the fields below and I will contact you within 48 hours.