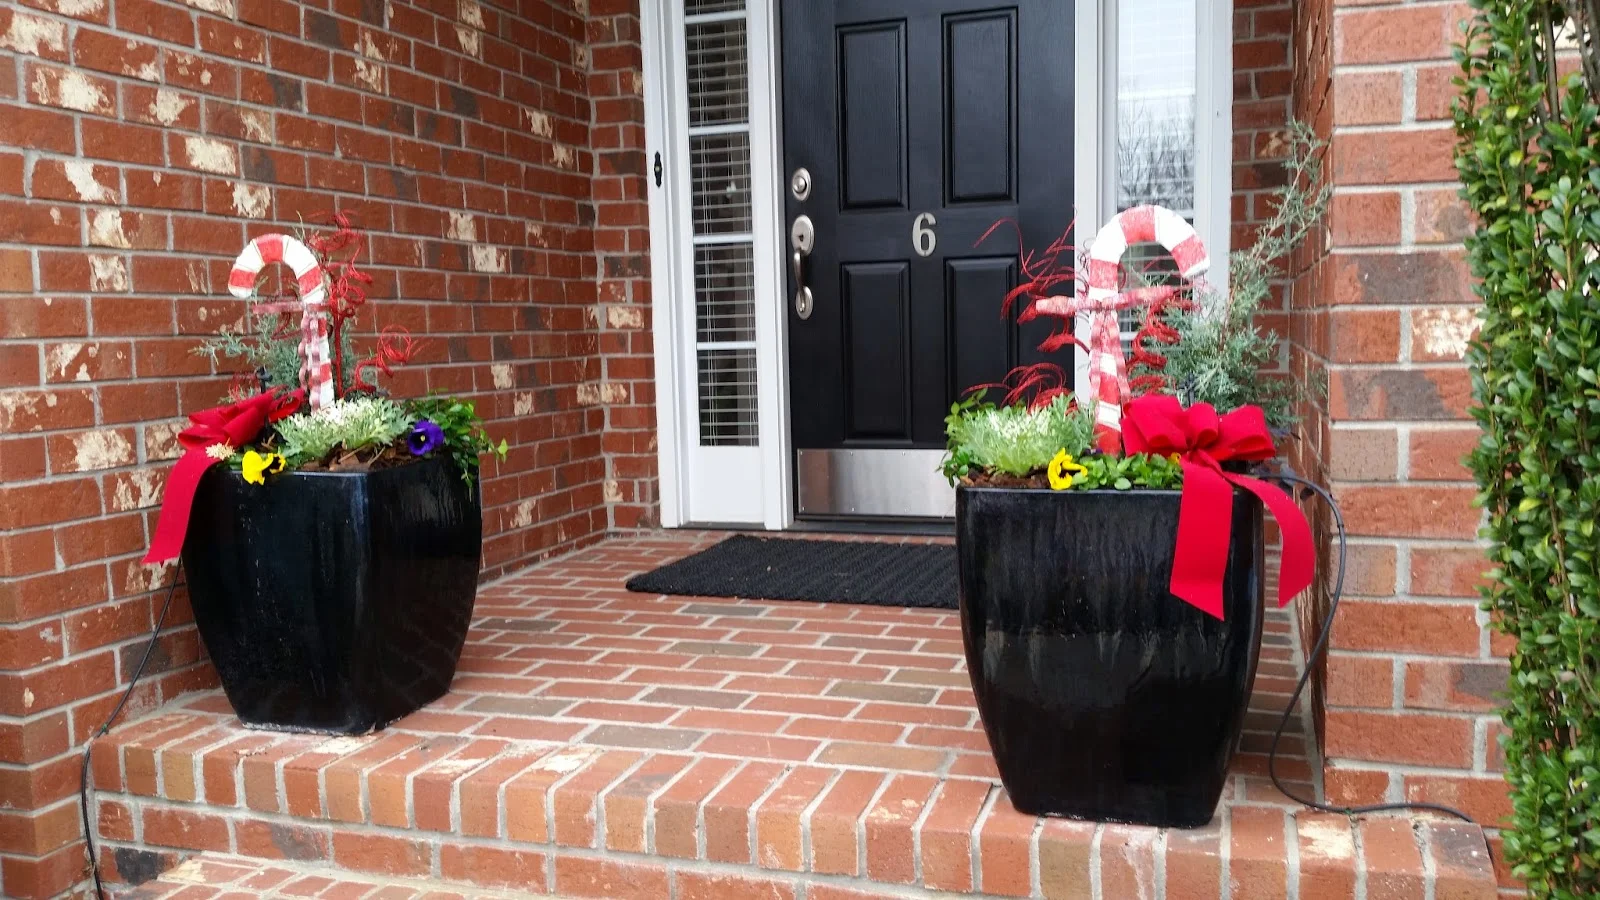

All throughout the year, container gardens can bring beauty to your outdoor, and indoor spaces. Here in the South (I am in zone 7-8), I create outdoor container gardens even throughout the winter. This month, the 'container elf'' visited my customers to create holiday containers to adorn their porches and decks. I thought this was a good opportunity to give you a D.I.Y. on the ins and outs of creating an aesthetically pleasing container garden for your home.
First, assemble your materials. I would use an 15" diameter container or larger. Proper drainage is essential so if you use a plastic container, make sure there is a hole in the bottom. You will need a saucer at the bottom to catch any overflow. Add several inches of gravel in the bottom for drainage and fill the rest with Miracle Grow or other high nutrient potting soil. If doing an indoor container, they will need to be regularly fed during their growing season. If using a standard topsoil, plan on adding an all encompassing fertilizer, such as Osmacote.
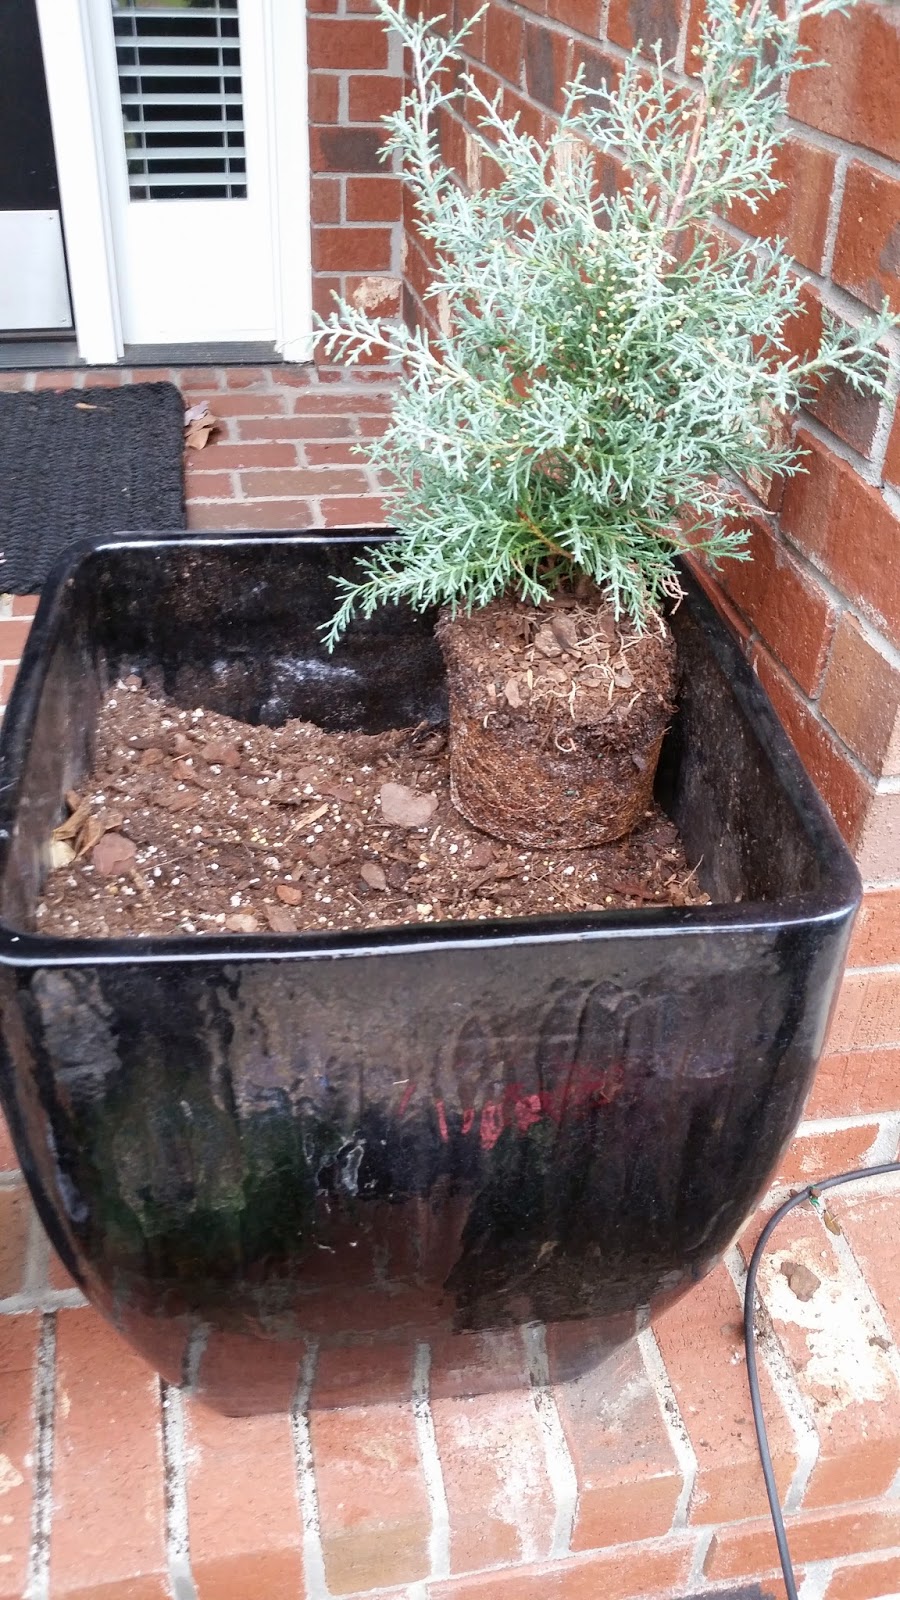
Container with hole in the bottom
Gravel
Topsoil or Miracle Grow
Shredded hardwood mulch.
Fertilizer, if not using Miracle Grow
Holiday or other decorations.
Next, purchase your plant material. In my containers, I used the following:
Carolina Sapphire Cypress ( this will need to be eventually moved out of the container- but looks great for several months)
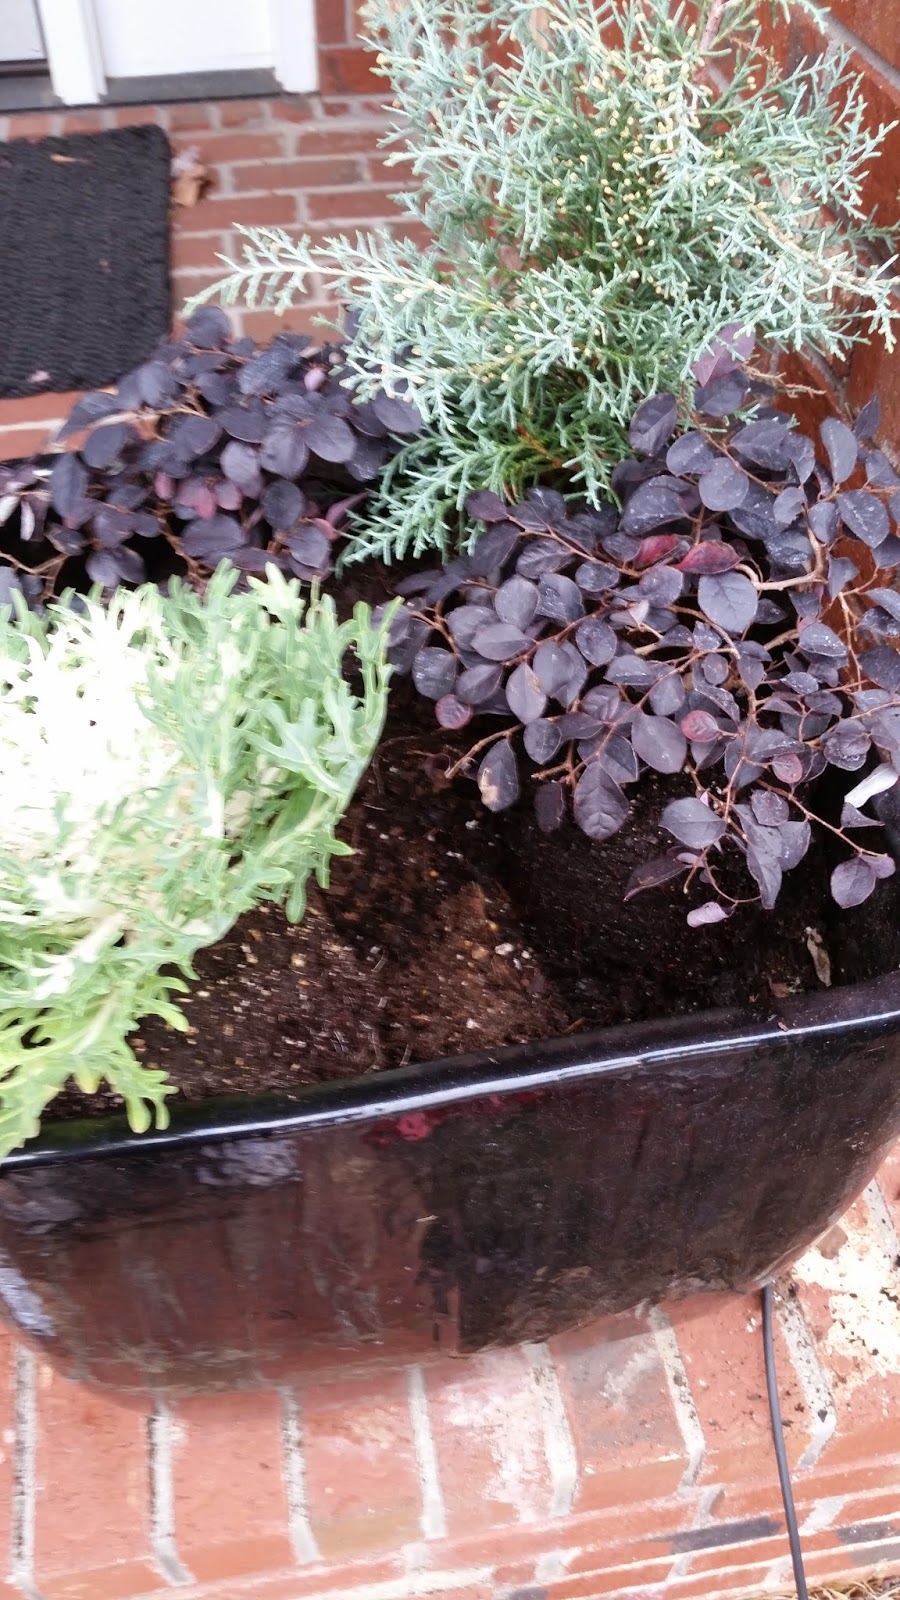
Loropetalum 'Purple Pixie'- evergreen shrub
Euonymus minimus- evergreen vine
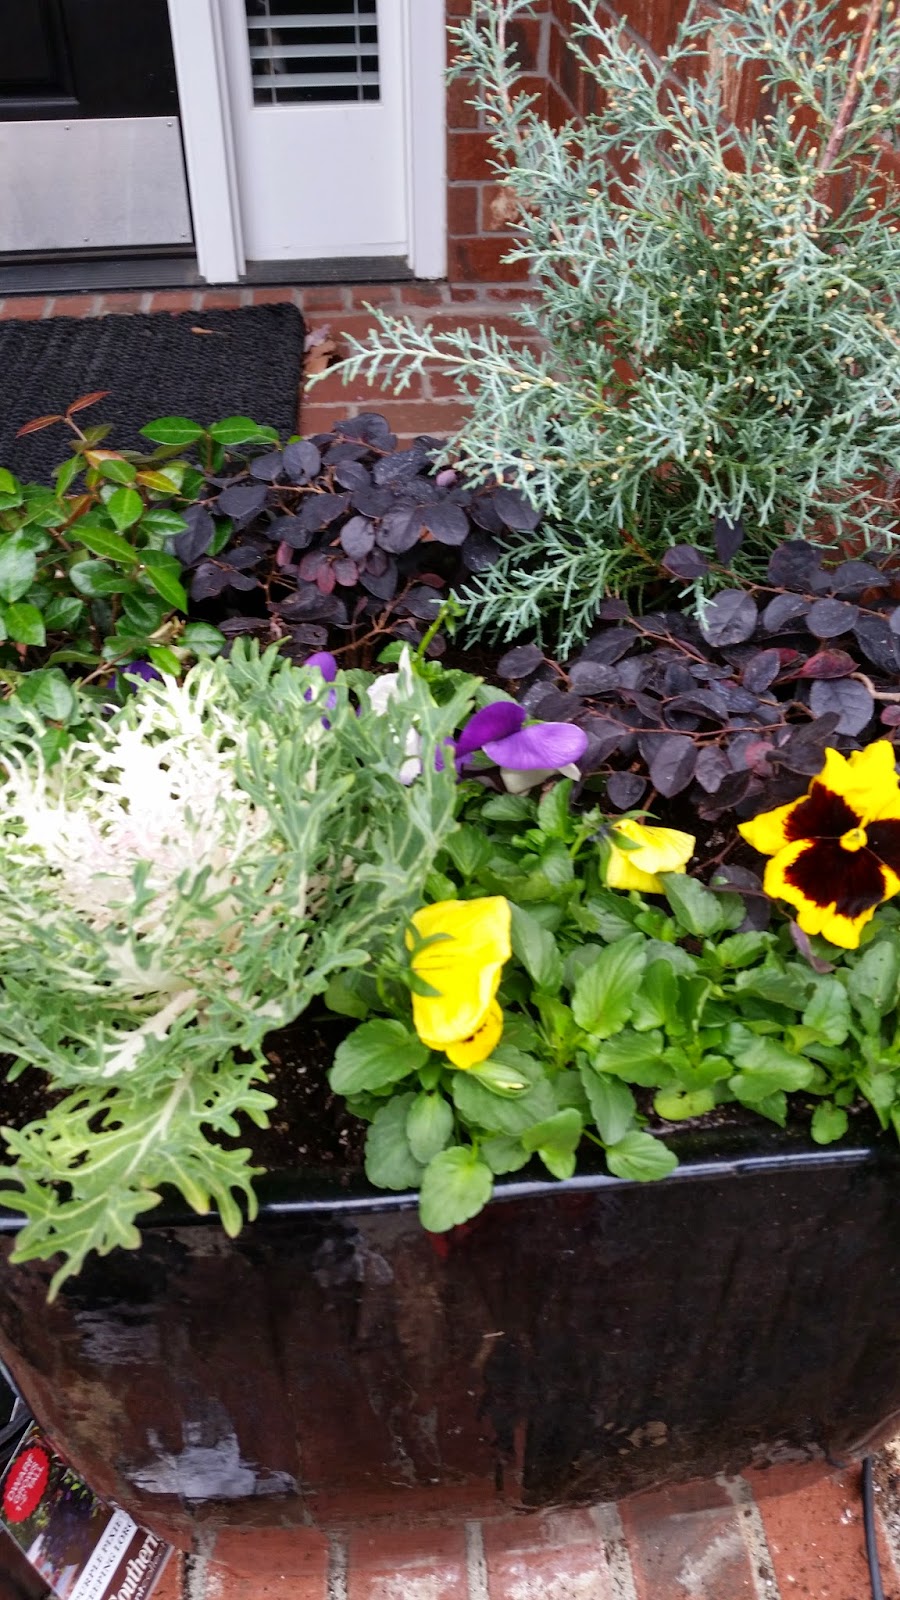
Ornamental Cabbages- these are available in pink, or white. Used these to add color to the container.
Pansies- I chose yellow and purple. This is also used to add color to the container.
The you are ready to assemble your container: Before you begin, however, there is one principle to remember: The old formula 'Thrillers, Spillers and Fillers' for a beautiful container garden always applies.
Add several inches of gravel and then enough topsoil to fill the container up to about 4-5" shy of the lip of the container.
Install the largest plant in your collection- to the back of the new container. After removing the plant from the pot, loosen the soil around the roots to encourage the roots to grow into a new medium. Fill around the new plant and gently push the soil into any air holes around the plant.
Add the next mid-level plant- around the first plant. Use the same method as with the first.
Add a vine or other 'Spiller' to the outer edge of the container- to encourage it to drape over the container edge as it grows. Also fill around this plant with topsoil, filling in any air holes.
Add the Ornamental Cabbages, filling around them.
Add the annuals towards the front of the container so it is most visible.
Fill in any remaining gaps in the soil and pat gently to stabilize the plants.
Add shredded hardwood mulch to finish the container and to help maintain moisture.
Add Holiday or other decorations.
Once planted (if the weather cooperates), the plants will fill in and begin to spill over the sides of the container. Enjoy creating yourcontainer gardens. They also make great gifts for your family and friends!
See more and follow me on INSTAGRAM!
About the Author:

Lori Hawkins, RLA, ASLA has been a registered landscape architect and active in the landscape design/build industry for over 29 years. For additional inspiring project pictures, design ideas, or great garden gifts, take a look at these websites:
HOUZZ: http://www.houzz.com/pro/hawkinsla/__public
FACEBOOK: https://www.facebook.com/pages/Hawkins-Landscape-Architecture/107145146130?ref=hl
GARDEN ART AND GIFTS: WWW.TriadGarden.com
DESIGN WORK PORTFOLIO: WWW.HawkinsLA.com